2.1. Creating a Schema
- 2.1.1. Schema Fields
- 2.1.2. Custom Fields
- 2.1.3. Validation
- 2.1.4. Formats
- 2.1.5. Indexes
- 2.1.6. Add More Fields
- 2.1.7. Relations
- 2.1.8. Suggested Format
A schema contains all the information needed to create an object. For example when we think about an Article it could have the following properties.
- Title - Text Field; required
- Detail - Textarea Field; required
- Status - Select Field with the following options:
- pending - Still a work in progress
- reviewed - Draft is complete and reviewed by an editor
- published - Article is now viewable to the public
- Published Date - The date showing when it was first available to the public
We also can determine that an Article should have an Author (1:1 relationship), but an Author is another kind of schema which we will cover later in this chapter. If you have worked with articles in other systems, you can already visualize how the form should like.
Figure 2.1.A. Visualizing the Article Form

Let’s begin by going to http://127.0.0.1:8888/admin/system/schema/search.
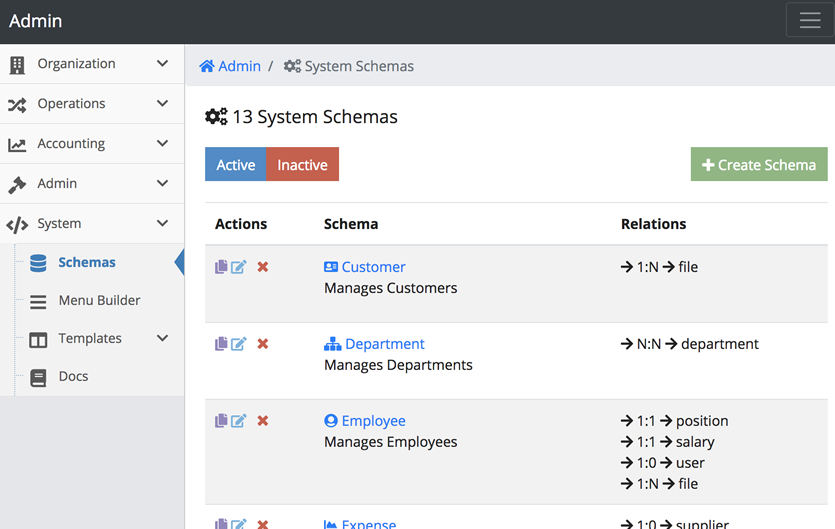
You should see something similar to Figure 2.1.B. Schema Search. Some schemas
show a lock icon to the left. These are schemas that were generated by a third
party package that is required in order for that package to work. If you wanted
to remove those schemas, you need to remove the associated packages.
What’s installed?
The following is a list of installed packages that defines schemas in the system. These schemas are also provided in case you would like to add more columns explicitly. Like the case of the Profile schema, you may want to add more fields like a profile image, email, phone etc.
- API - Used to manage OAuth, REST and web hooks based from schemas and events
- Auth - Used to manage sign ups and log ins
- History - Used to monitor user activity within the system
- Profile - Used to manage user information
- Role - Used to manage roles and permissions of users
Figure 2.1.B. Schema Search
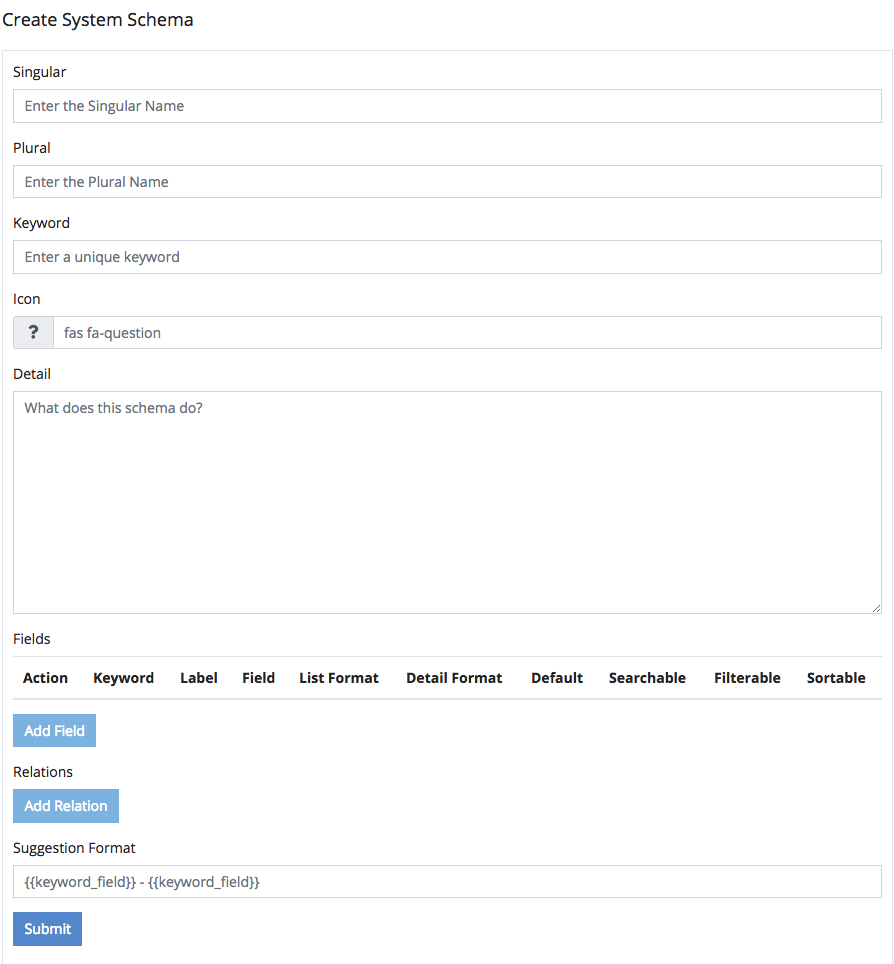
Click the Create Schema button on the top right and you should be redirected to the Schema Form which looks like the image below. The information on this form is used to determine how objects are created, inputted and displayed within the admin.
Figure 2.1.C. Schema Form
2.1.1. Schema Fields
We will call this the Article Schema. The following items describes what each field in the schema information is and recommendations on what to input. It’s important that the follow the prescribed values for now, as they will be referenced throughout this and the next few chapters.
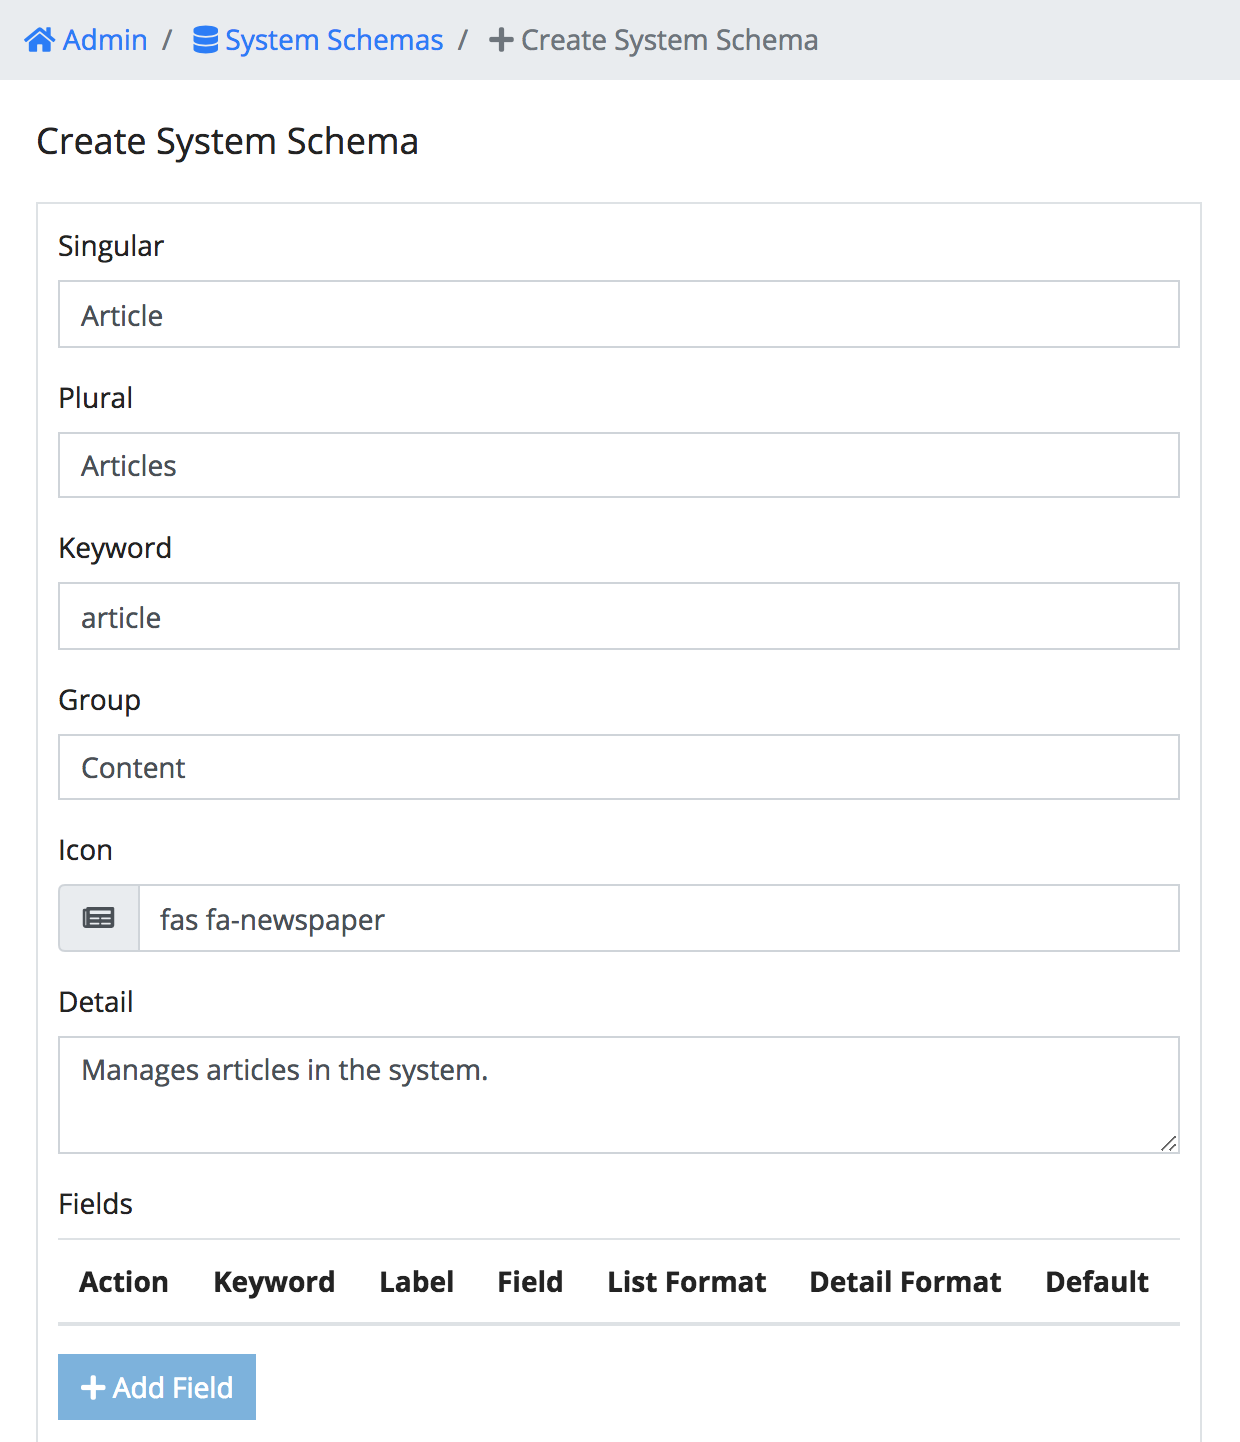
- Singular - required; This is the name of your object. Since we are going to create
a schema called article, enter
Articlein that field. - Plural - required; This is the plural name form of the object. We need to know this
to properly label the search page and instead of computing what the plural form
for every possible noun in ever language and context, it’s better off we
explicitly tell the system what it is. Enter
Articlesin that field. - Keyword - required; This will be the programatic name of the object. The keyword
should not have any spaces, dashes, or any special characters besides, letters,
numbers or an underscore. When you enter the Singular field, this field
automatically got populated with
articleleave that value alone for now. - Group - optional; In newer versions of Cradle, this new field was introduced to
help categorize schemas, which is very helpful when you have tons of schemas
defined. Enter
Contentin that field. - Icon - optional; If you click that field a drop down of Font Awesome icons should appear. Feel free to choose any icon that is suitable to represent Articles.
- Detail - optional; This field is shown on the schema search page so you don’t forget
what this schema does. Enter
Manages articles in the system.for now.
If you were following this section thoroughly, then your schema form should look like the following image.
Figure 2.1.1.A. Article Schema
INFORMATION: Some images in this documentation maybe cut off for readability.
Try clicking on it to get the full view.
2.1.2. Custom Fields
Now that we have our Article Schema information populated, let’s continue on to create the fields. We will be creating our first custom field called Title. Look for the green Add Field button and click it.
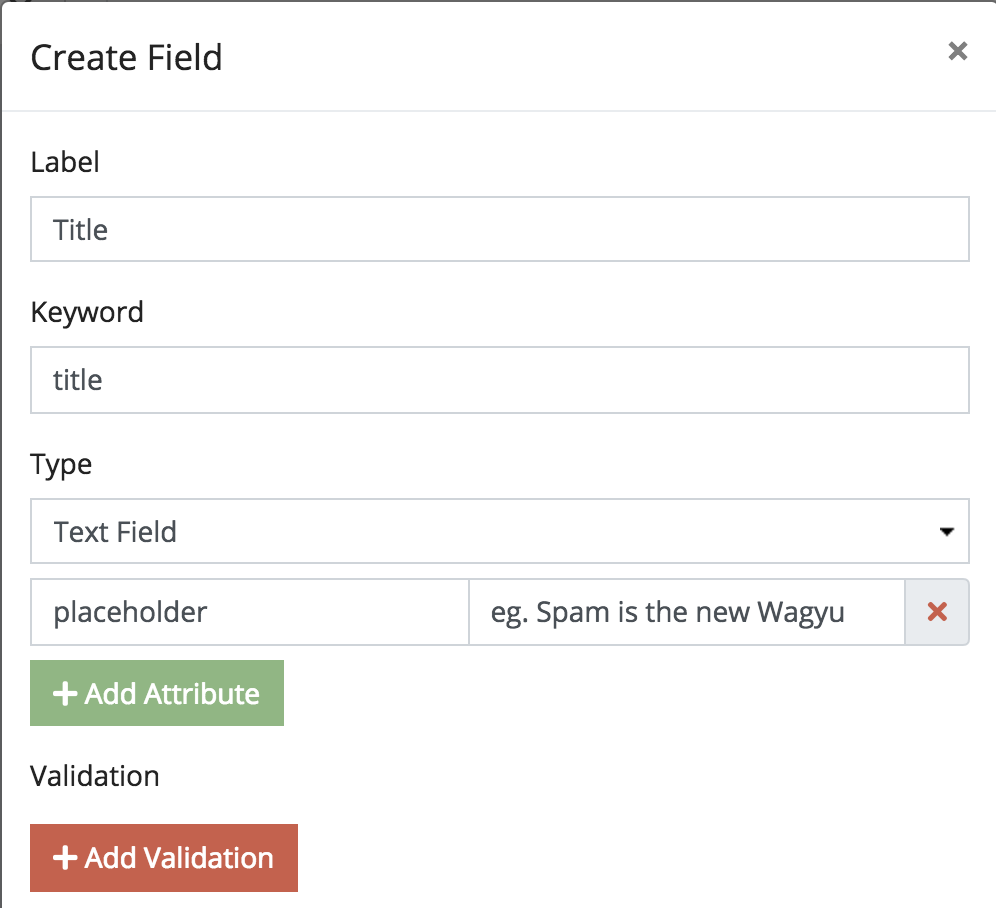
Figure 2.1.2.A. Field Form
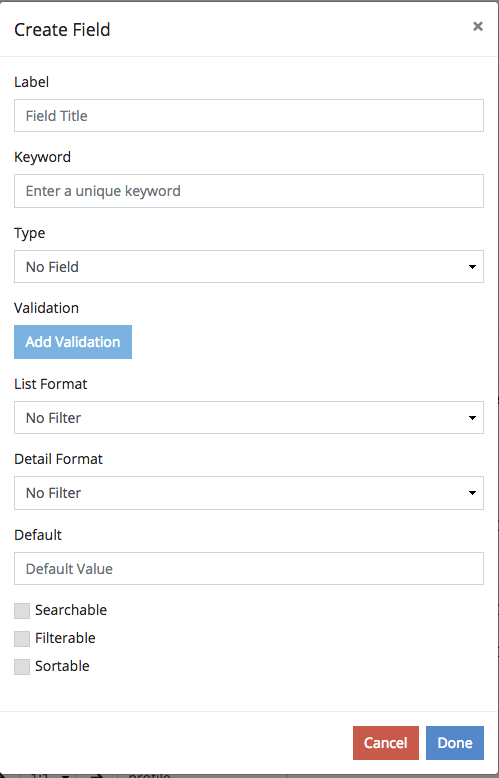
The following items describes what each field in the Add Field form is and recommendations on what to input. It’s important that the follow the prescribed values are used for now, as they will be referenced throughout this and the next few chapters.
- Label - required; This is the title of a field used on forms. Enter
Titlein that field. - Keyword - required; This will be the programatic name of the field. The
keyword should not have any spaces, dashes, or any special characters besides,
letters, numbers or an underscore. When you enter the Label field, this field
automatically got populated with
titleleave that value alone for now. - Type - optional; This is a dropdown of possible field types you can
choose from. We tried to add as many possible fields we can think of and for
any that was missed, you can define your custom fields as well. You can discover
more about these types in 2.A. Reference: Field Types.
For now, choose
Text Fieldwhich is the equivalent toinput[type=text]. This will produce a button called Add Attributes click it and on the Attribute field enterplaceholderand on the Value field entereg. Spam is the new Wagyu - Validation - optional; When a user creates an object, these will be used to help determine if the system should process the form submitted. More information will be covered in 2.1.3. Validation below.
- List Format - optional; This is used to determine how the value of this field should look like on a listing type page (like a search page). More information will be covered in 2.1.4. Formats below.
- Detail Format - optional; Similar to List Format. This is used to determine how the value of this field should look like on a detail type page (like an article page). More information will be covered in 2.1.4. Formats below.
If you were following this section thoroughly, then your field form should look like the following image.
Figure 2.1.2.B. Title Field
2.1.3. Validation
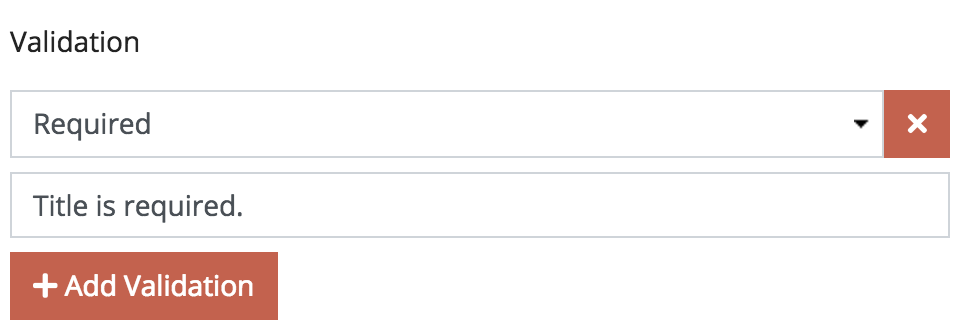
Next let’s make the Title required. Click Add Validation and by default
Required will be selected. Leave that the way it is and in the Error Message
field set the value to Title is Required. In the future, when a user enters a
value for this field, and before it is created, the value will be checked against
the validation that you setup herein. You can use a combination of validation
options to suggest the correct kind of input from a user.
Figure 2.1.3.A. Title Validation
As you can also tell there are a lot of validation options. You can discover more about these validations in 2.B. Reference: Validation Types.
2.1.4. Formats
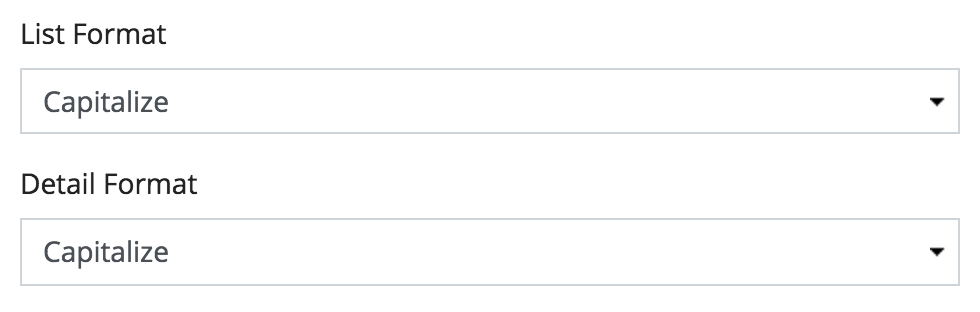
In the List Format and Detail Format choose Capitalize. In both the
Article Search Page and Article Detail Page, this will transform the
field value of Title to capitalize every first letter of every word. Formats
are used to determine how a value should be displayed to the user.
If you create a number field that allows 7 digits, a user can input 9999999
but reading that could be cryptic without commas (9,999,999). Based on this,
we can conclude that the input may not be necessarily what we want as the output.
This is the idea with output formats.
Figure 2.1.4.A. Title Formats
In the system, list output formats filters the output in search pages in the admin and detail output formats filters the output on detail pages in the admin. You can discover more about these formats in 2.C. Reference: Format Types.
2.1.5. Indexes
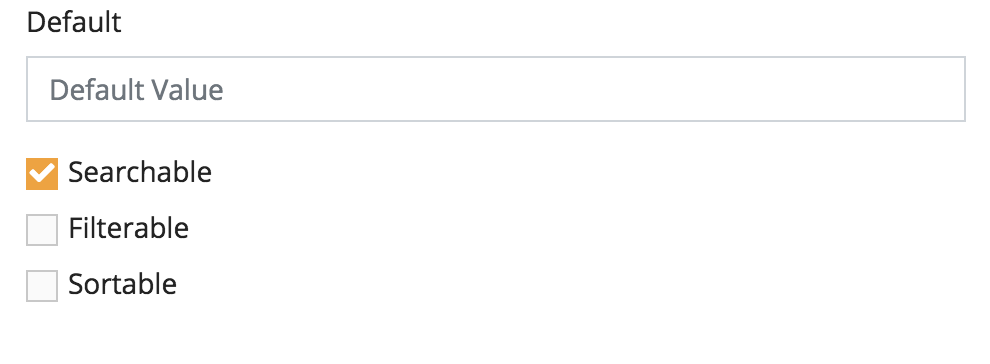
For now, set the Title to be just Searchable and do not check
Filterable or Sortable. We call these three fields indexes.
The following briefly describes what they are used for.
- Searchable - When a user searches the object rows, this will make the values of this field part of its search criteria. Making too many fields searchable will make the results vague, so its recommended to use this sparse.
- Filterable - Users can filter the search results by these values. This is useful when values are a finite set of values.
- Sortable - Users can sort search results by these values. This is useful for number based and date/time based fields.
You can discover more about Indexes in 2.D. Reference: Indexes & Relations.
Figure 2.1.5.A. Title Should be Searchable
2.1.6. Add More Fields
Continue to add the rest of the fields for the Article. Provided below is a summarized cheat sheet of recommended fields that should be added.
Figure 2.1.6.A. Article Schema Cheat Sheet
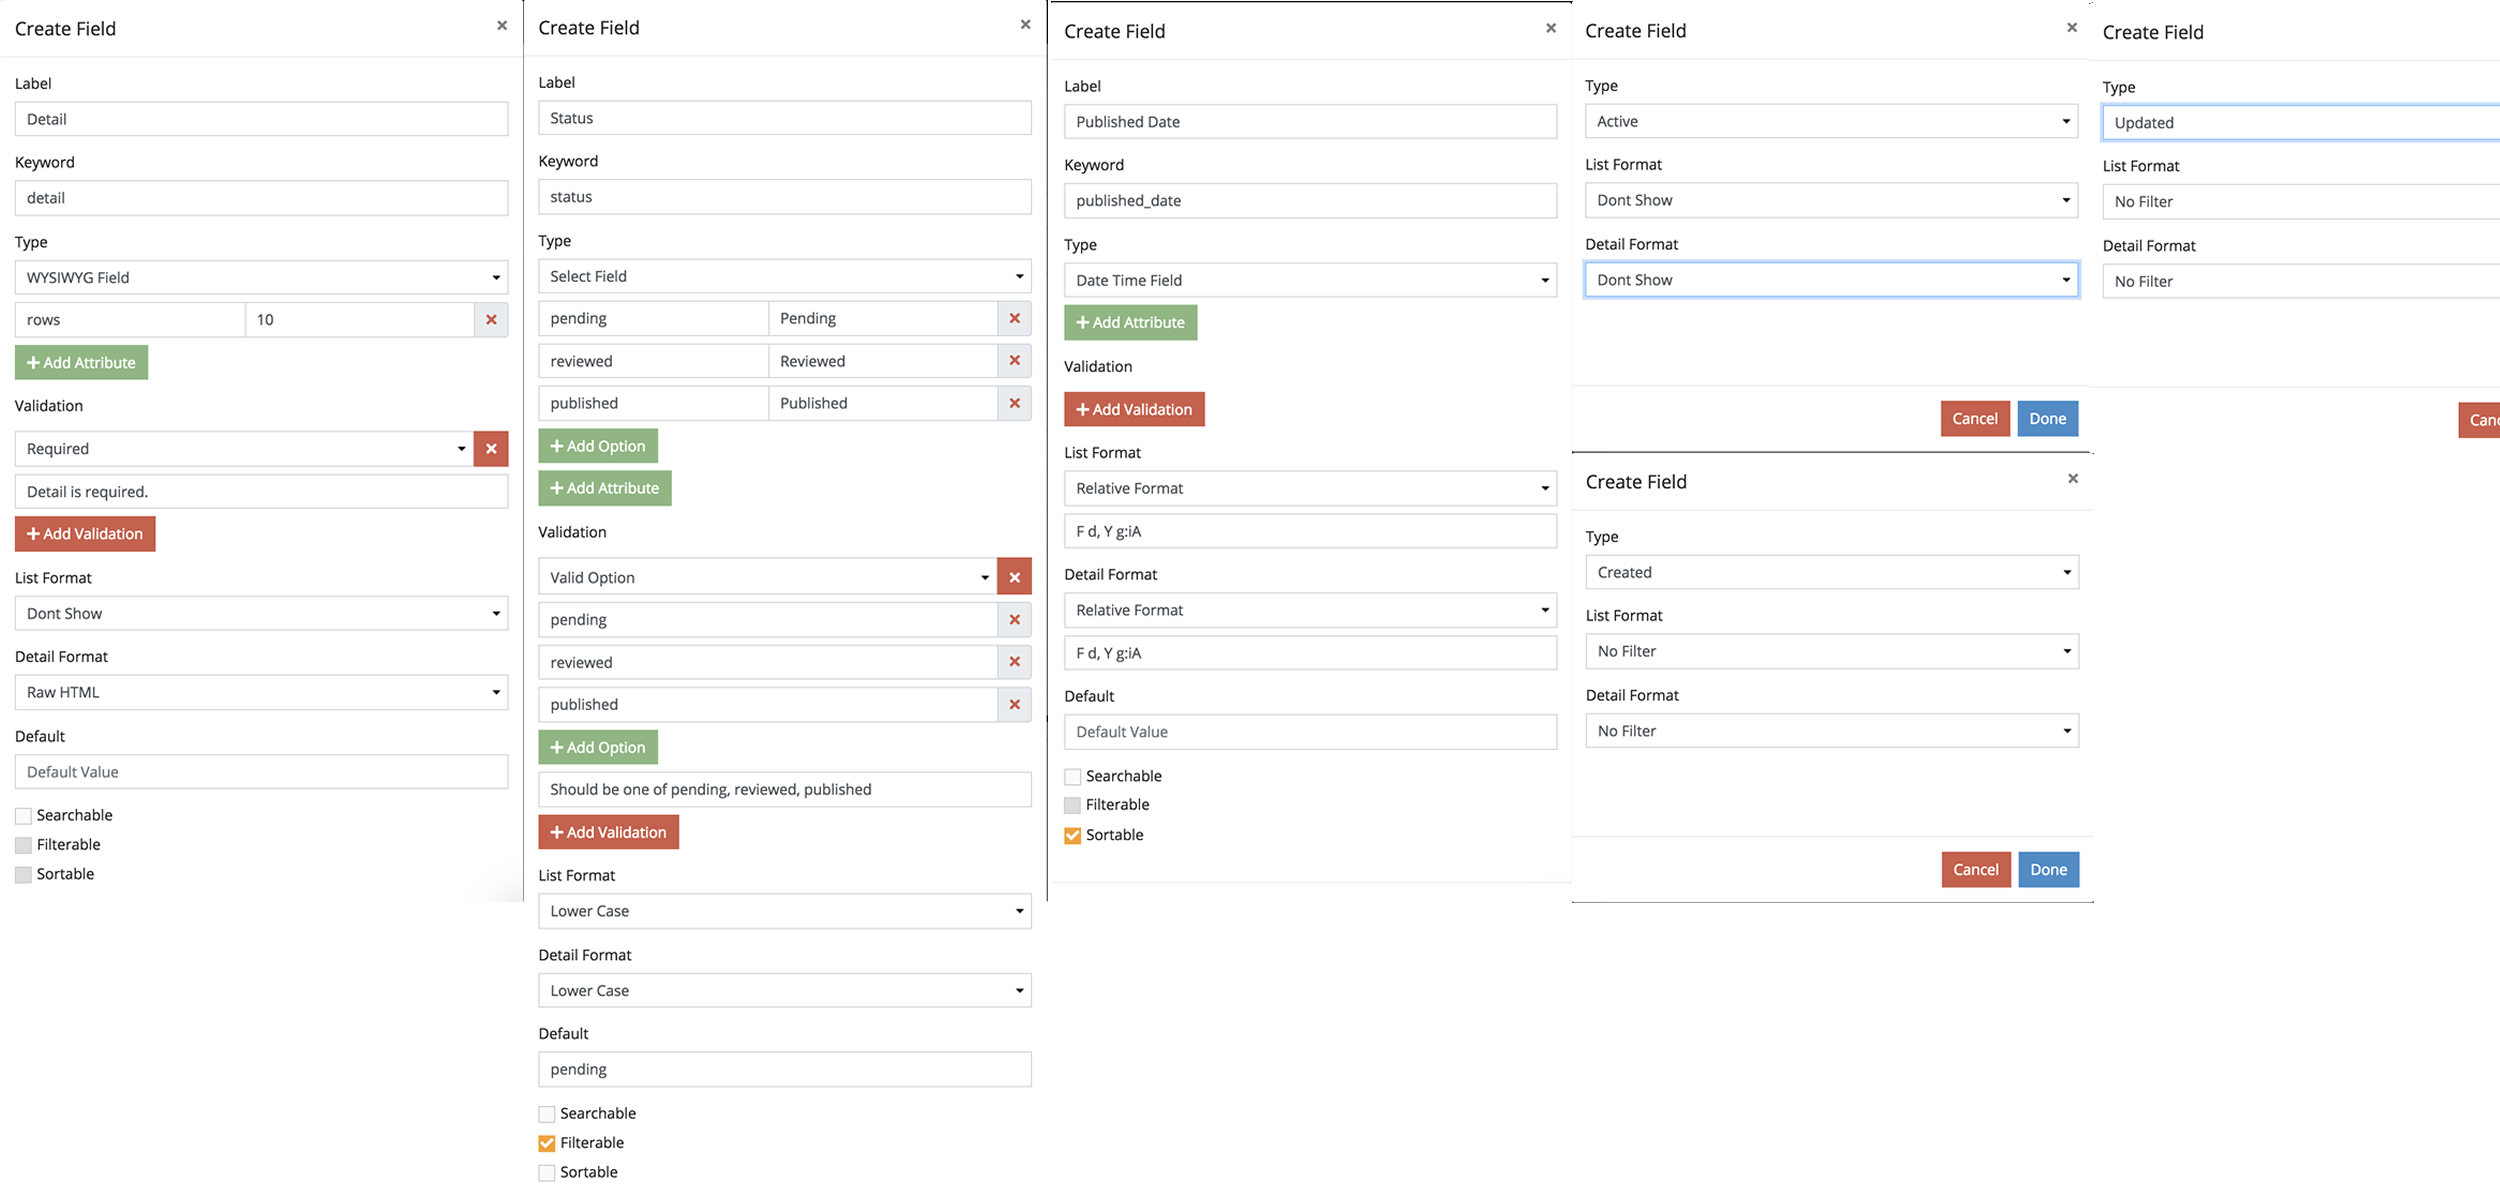
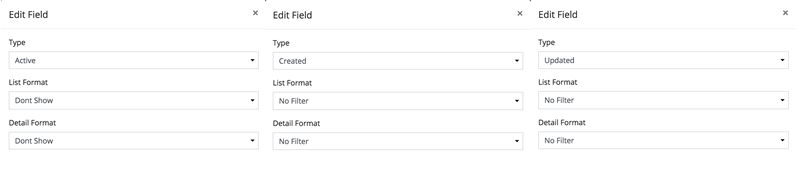
In this sheet, there are three special columns called Active, Created and Updated. These columns are not actually fields, but placeholders that perform the following activities.
- Active - Allows Articles to be restorable. Without this, whenever an Article is removed it is gone forever
- Created - This adds a system timestamp whenever an Article is created
- Updated - This adds a system timestamp whenever an Article is updated
Figure 2.1.6.B. Active, Created and Updated
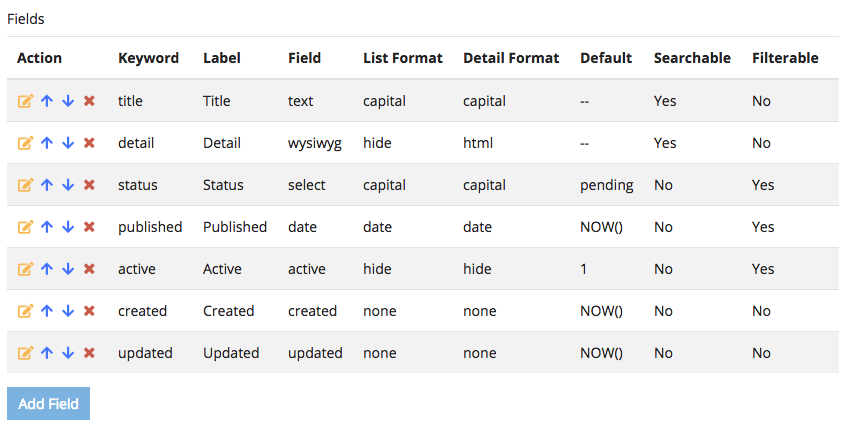
If you added all the fields correctly, your field table found in the schema form should look like the following image.
Figure 2.1.6.C. Article Field Table
2.1.7. Relations
Figure 2.1.7.A. Article Relations
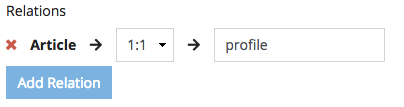
Next click the Add Relation button and set the dropdown to 1:1 and the
field value to profile. This will setup a required one-to-one (1:1)
relationship with profile which will act as our Author Schema in this case.
In other words, “an Article should have an Author“. You can discover more
about Relations in 2.3. Working with Relations.
2.1.8. Suggested Format
The last step is to set the Suggested Format to
{{article_title}}. Suggested formats are used when other
schemas declares a relationship with article. You can discover more
about Suggestions as well in 2.3. Working with Relations.
2.1.9. Conclusion
The best code ever written, is the one you never had to write. – Steve Jobs
That is the basic gist to build a schema in Cradle. This saves a lot of time versus getting your back end custom made. The purpose of this is to have your developers move on to the advance things while the basics are taken care of. In the next section 2.2. Populating Models, we will go over how to add new articles and manage its entries.